DTF Printing-Ultimate Guide on How TO Get Started
Share
DTF printing and Step by Step Process
The term "digital printing on textiles" refers to a variety of techniques. This article will concentrate on the DTF printing process (Direct to Film Printing).
You can find our blog on the sublimation process and how to get started with it here.
If you are confused about which to choose between White Toner Printer, DTG, or DTF, your answer to the question is in this post.
Now moving forward to the Direct-to-Film Printing process-
What exactly is DTF Printing, and how does it function?
The DTF technique is as straightforward as its name implies: print on a film and transfer directly to fabric. The flexibility to choose almost any fabric is the most essential aspect that makes this approach appealing to a larger audience. DTF printing will undoubtedly work its magic on polyester, cotton, silk, or synthetic fibers such as rayon or terry cot.
What things are needed to get started with DTF Printing?
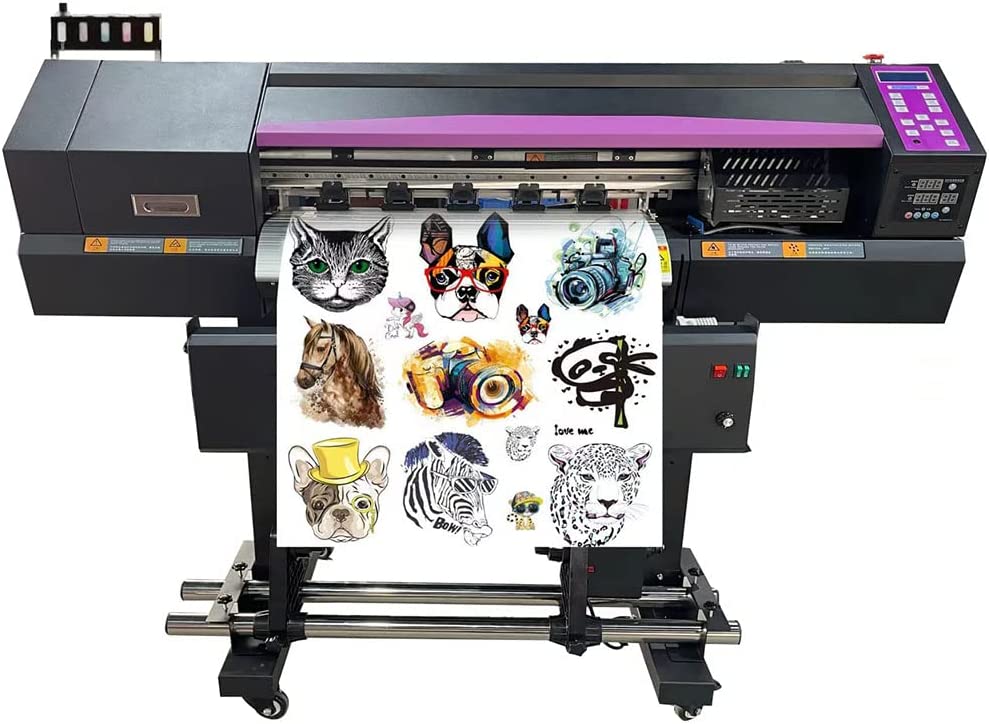
1. DTF Printer
Alternatively known as DTF Modified Printers, direct-to-film printers print on film. Simple six-color ink-tank printers like the Epson L800, L805, and so on are the mainstays of this group of printers. There are six distinct colors in this printer series. White DTF inks may be placed in the printer's LC and LM tanks, making operation easier. Similarly, the rollers used to slide the page have been removed to prevent the formation of "linings" on the white layer of the DTF film.
2. PET Films
The DTF printing method uses PET films, which are made from polyethylene terephthalate. These films are not the same as those used in screen printing, which is a separate process. With a thickness of 0.75mm, they offer superior transmission capabilities, as well. As DTF Transfer Films are commonly known in the market, this type of film is typically referred to as such. In addition, to cut sheets, DTF films are also available in rolls (used with a commercial setup). According to the sort of peeling that occurs after the transfer, PET films can be classified in a second way. As a result of the temperature, the films are classified as either hot peel or cold peel films
3. DTF Printing Software
As part of the process, the software is crucial. A large part of the Software's effect is on print qualities, ink color performance, and final print quality on the cloth following transfer. When printing DTF, you'll want to use an image-processing application capable of handling both CMYK and white colors. All of the elements that contribute to an optimal print output are controlled by DTF Printing's software.
4. Adhesive Powder
In addition to being a binding agent, the DTF printing powder is white and functions as an adhesive substance. There are several micron-sized grades of DTF hot melt powder. On the basis of requirements, a grade should be determined.
5. DTF Printing Ink
Cyan, Magenta, Yellow, Black, and White pigment inks are available for DTF Printers. A unique component known as White Ink is used to lay down a white foundation on the film on which the colorful pattern will be produced.
6. Automatic Powder Shaker
It is used in commercial DTF installations to apply the powder evenly and to remove the residual powder, among other things.
7. Heat Press Machine or curing Oven
A curing oven is a tiny industrial oven used to melt the hot melt powder that has been placed in the transfer film. Alternatively, you can use a heat press machine that is engineered to imprint a design or graphic on a substrate, such as a t-shirt, with the application of heat and pressure for a given period of time. This should be used with minimal to no contact.
Step by Step DTF Printing Process
Now that all the items are arranged, we move on to the process. Step by Step DTF printing process entails the following steps.
Step 1: Create a print on the film
Fill the printer trays with PET film.
Press the Print button.
The inkjet printer will print "direct to film," which will transfer the picture to your PET film.
When removing the print from the tray, take care not to smear it!
Step 2: Spread the powder evenly on the surface.
In this technique, a hot-melt powder is applied to a film that has an image printed on it.
During the printing process, the powder must be added to the wet print.
Assure that the powder is spread evenly.
As a rule, you'd keep a tray next to the printer, sprinkle ink on the web print, and then seesaw back and forth until the wet ink is covered with ink. Then, shake off the excess very cautiously.
Automated shakers are also available for bespoke t-shirt businesses that are extremely busy.
Step 3- Melt the Powder
After melting the powder in place, what comes next is the melting of the powder in the place of spread.
Direct-to-film DTF transfers are most often baked for around 2 minutes in a conventional oven.
You may also use your heat press if you're already in the custom t-shirt business and performing DTG, vinyl, or white toner printer transfers. Simply hover over the area without exerting any pressure. In other words, it is possible that the top of the press is not in contact with the transfer at all.
On purpose, DTF transfers are not cured at certain times or temperatures. To be safe, always consult the manufacturer.
Step 4- Pressing the t-shirt before use
A t-shirt isn't required, of course. You should be able to apply your DTF transfer to any application without any issues. In the print, any creases will be visible!
In addition, and perhaps more significantly, the material will be thoroughly dried as a result of the process. Humidity in the air may cause a cloth to absorb a surprising amount of moisture, which can impact print quality.
Step 5- DTF Printing Transfer Application
A direct-to-film conversion does not need to be used immediately. They store well, much as most other types of transfers. It is for this reason why so many small enterprises focus solely on selling their own transfers!
Heated PET film containing an image and powder are applied to pre-pressed material. Following the manufacturer's directions, you'll heat press the transfer onto the shirt just like you would any other.
A screen-printed garment isn't thrown into a tunnel dryer, and this procedure should take less than 30 minutes.
Step 6- Peel-Off Transfer
DTF employs a cold peel method of peeling.
It's best to wait until the cloth and transfer are totally cooled off before pressing them onto a shirt.
Press all the shirts one by one and peel them after they have cooled.
While cooling, the hot melt works as a binder, binding the colored pigments in ink to cloth strands.
You may then remove it by peeling it off when it has cooled.
Step 7- After Finish Press
DTF printer transfers, like white toner printer transfers, require a final press to ensure the printer's durability.
In most cases, this final step takes no more than 10 to 15 more seconds.
A direct-to-film (DTF) print does not have the same restrictions as sublimation or direct-to-garment (DTG) printing.
It's a really impressive device for transferring files. Any cloth may be treated with it!
Cost of DTF Printer
Inkjet printers such as the Epson L1800 or R2400 may be readily converted into DTF printers. You will also need a heat press.
An Epson SureColor SC-F2100 DTG printer may cost upwards of USD 18,130, but a brand new L1800 with a heat press can be acquired for less than USD 1500.
We hope this article brings you all the information you may need for your DTF printing project. If you want custom t-shirts, canvas, mugs, phone cases etc, we are available at Himalayan Tees as well. Check us out.